The eclipse plugin developed can be exported to be accessed via the update-site. This involves creating a Feature project for the plugin and uploading the same to a file (ftp)/web server, from where, the same can be accessed using a URL via the Eclipse plugin installer.
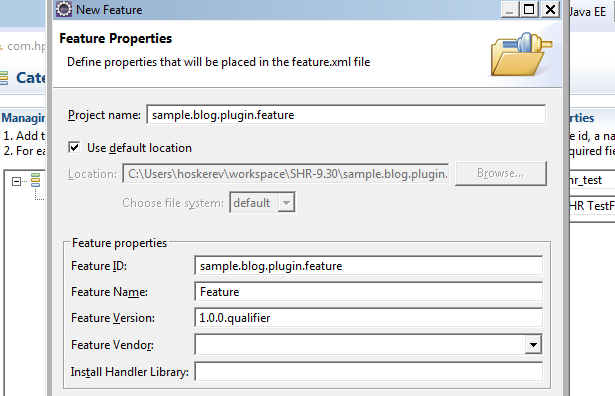
The first step involved in the procedure is to create a feature project for the plugin created.
- Choose File -> New -> Plug-in Development -> Feature Project and click Next
- Enter the Name for the project and select Next
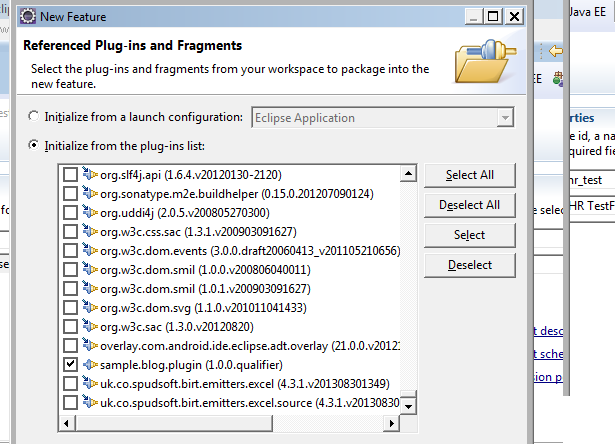
- Once done, select the plugin that is to be bundled as a feature from the plug-ins list –
- Click on Finish to create the project
- Next, a new update site project is to be created which will refer to the feature just created. Navigate to File -> New -> Plug-in development -> Update Site Project to create a new update site and then give the same a meaningful name.
- In the site.xml file that opens up, click on “New Category” to create a category definition that will be added to the software repository
- Provide a meaningful ID and name for the category and optionally also add description for the category
- After creating the category, the feature must be linked to the same to ensure when installing the plug-in from the update site, the required feature will be listed under the category selected.
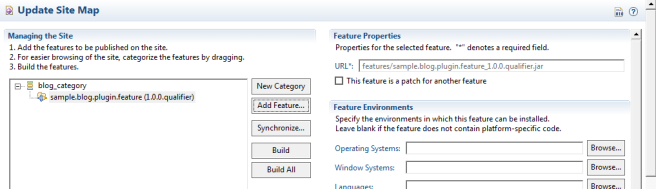
- In the Archives tab of the site.xml, provide information on the Name, URL and description of the FTP server where the plug-in is to be hosted
- Now the update site is created. Next select the category and click on the “Build All” button to package the plugin. Once built, the package will be exported to the root folder of the current update site project itself
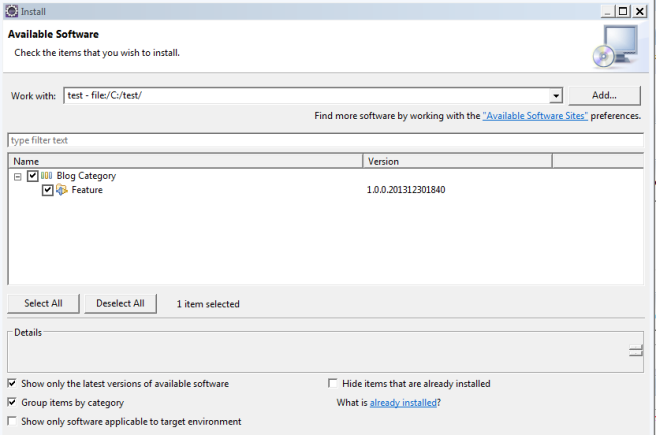
- The plug-in is ready to be installed. Go to Help -> Install New Software to add the local site (project location from the previous step) to the repository and install the plugin.
- Restart Eclipse to use the plugin installed
